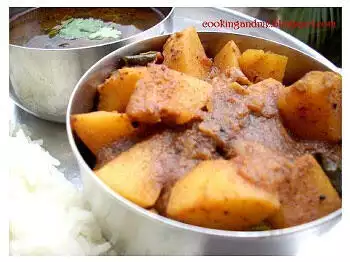
Some of my favourite pictures I have taken are of baby corn masala, heart-shaped cookies, and I love the lighting in this dry aloo gobi recipe.

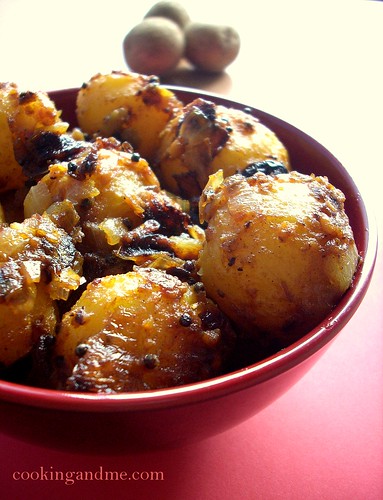
Now here is a picture of spicy baby potatoes that uses a slightly different recipe but captures the same subjects – potatoes and masala.
There are several things I changed in the second picture.
1. Pic 2 was clicked near a window, indoors whereas Pic 1 was clicked by putting the dish on a plate in the balcony. The light was harsher in the first case.
Understanding the right amount of light needed and placing your dish at the right spot to photograph is most often the first step.
2. I used a different bowl for Pic 2 that was wider and could hold more of the dish. This is not always necessary but having a good set of plates and bowls goes a long way too. That was one of the first things I realised and now I can safely say I am addicted to cookware. I pick up cheap yet pretty bowls wherever I go.
3. I used a red chart paper as the base for Pic 2. This helped enhance the colour tone of the picture and match the colour of the bowl. I am still working on this aspect of food photography – choosing a good base and background for my pictures. I don’t have that many props yet but next time I go to India, I intend to pick up some cloth material and kitchen napkins that will give me a nice solid base and background for the pics.
4. I clicked Pic 2 in a different angle. This is pretty much up to you. Most of us are comfortable with taking a shot from above, since we don’t do elaborate setting for our pictures and if we take a shot at eye-level, we are going to capture some unwanted things around the dish or in the background.
I am normally very lazy to do any setting for my pictures. The most I end up doing is to place some coriander leaves around the bowl or wrap my brown kurta around it to enhance the dish. You can still get some pretty pictures this way, I feel.
5. I did some very basic editing for Pic 2 using Google Picasa and Photoshop. Its okay if you don’t have photoshop. You can still make your pictures look much better with some basic tweaking with Picasa.
And I will share the tips I know with you in the next post in the series 🙂
Disclaimer:
– I am NOT a food photography expert or a professional photographer. Since that comprises most of us out there, I am hoping you can relate to my posts as a normal food blogger who just wants to take better pictures of her/his food.
– The posts are written in the assumption that you don’t own a fancy camera or lights or elaborate setting for your pictures. If you do, then you wouldn’t be reading this post anyway ‘cuz in all likelihood, you already take great pictures.
– There are no ugly pictures. Or bad ones. There are just different pictures. I know of people who like my pictures better than the ones you see on some professional food photography websites. This post is dedicated to them 🙂


Hi nags lovely post.very motivating ,got lot of ideas on how to take good photos.i dont know how i missed this post.i have been reading u r blog regularly..
Hi Nag,actually I want to start my blog but I am suspicious that I could take lovely pictures like most successful bloggers,I have a good camera but your article gave me some courage to try and learn.It is really relieving to know that the most successful bloggers like you also starts with Zero.Thank you…..
everyone has to start somewhere. i'd say go for it 🙂
Lovely!
Very helpful post for beginners like me. I've been visiting your blog for a while now, very inspiring. Thank you!
hii nags,thank god i visited ur site. I have been running my food blog from the past 3months. I have this question whenever i take photo of my recipe. Thanks for the post. ?Visit my blog.
http://addictiontofood.blogspot.com
Just found this blog! Thank you for all the great tips!