Garlic pull-apart rolls, the easiest bread rolls you can bake, especially if you are a beginner to baking bread at home.
I had been eyeing this recipe of Garlic Pull-Apart Rolls from Suhaina for a long time. When she brought these rolls warm from the oven for our Singapore food bloggers’ meet, I was totally sold. Finally managed to make them this weekend.
I would highly recommend this to all those who are dying to bake but fear the yeast monster. Trust me when I say these eggless garlic pull-apart rolls are really fool-proof and you can feel so proud of yourself when done!
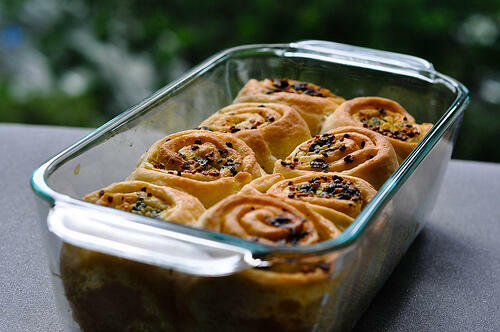
I halved the original garlic rolls recipe and got 8 mini rolls, enough to serve 2 very generously. We had one here and one there, through the weekend.
If you want to try similarly easy bread and rolls, check out my:
pesto pull apart rolls (also eggless)
Garlic Pull-Apart Rolls Recipe
Ingredients
For the rolls
- Plain Flour - 1.5 cups
- Warm Water- 1/2 cup + 1 tbsp
- Yeast - 1/2 tbsp instant or active dry yeast
- Salt - 1 tsp
- Sugar - 1 tbsp
- Olive Oil - 1 tbsp + 1 tsp
For garlic spread
- Salted butter at room temperature - 6 tbsp
- Minced garlic - 2 tbsp
- Chopped coriander leaves cilantro - 2 tbsp
Instructions
- Mix 1.5 cups flour, 1/2 tbsp yeast, 1/2 cup + 1 tbsp (if needed) warm water, 1 tsp salt and 1 tbsp sugar together until you get a smooth, slightly sticky dough.
- Add some olive oil to your fingertips and palms and knead until the dough springs back when you press with your fingers - about 4-5 mins
- Wrap the dough in cling film and allow to double by keeping in a warm place for about 45 mins. You can also just cover the bowl with a damp clean kitchen towel.
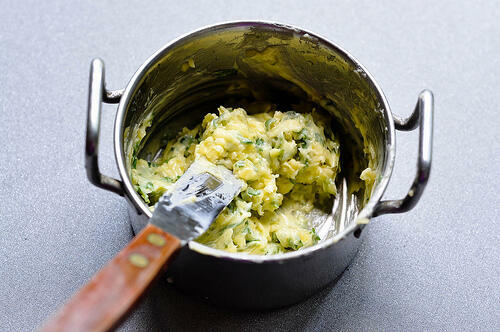
- Meanwhile, make the garlic spread by simply mixing all the ingredients.
- Grease a baking pan or loaf tin with olive oil. I used my glass Pyrex loaf pan which was the 6. perfect size for 8 mini garlic rolls.
- Knock down the air in the dough and divide it into two equal portions.
- Transfer one portion of the dough to a floured surface and roll gently into a rough rectangle of about 1/2" thickness. Apply more flour sparingly if sticky.
- Spread about 2 tbsp of garlic spread on one side.
- Roll from one end gently and as tight as you can.
- Cut into half and then each half again into two halves to get 4 equal portions.
- Now place the rolls with the cut side up in the greased pan leaving some room for rising while baking
- Repeat the same procedure with the remaining dough.
- Spread a little milk on top the rolls and add the remaining garlic spread on top. You can also add some sesame seeds or chia seeds on top to add some crunch.
- Allow to rise for another 20 minutes.
- In the mean time, preheat the oven to 180C / 375F.
- Bake the eggless pull-apart garlic rolls for about 30 mins or until the top is golden brown. My Pyrex glass pan usually takes longer to bake in, so mine took about 35 mins to bake just right. If the top seems to be burning or cooking faster, lightly cover with aluminium foil and continue baking
- These rolls are really soft and have an amazing flavour. Serve fresh and hot!
Step by Step Eggless Garlic Pull-Apart Rolls Recipe:
Mix 1.5 cups flour, 1/2 tbsp yeast, 1/2 cup + 1 tbsp (if needed) warm water, 1 tsp salt and 1 tbsp sugar together until you get a smooth, slightly sticky dough.
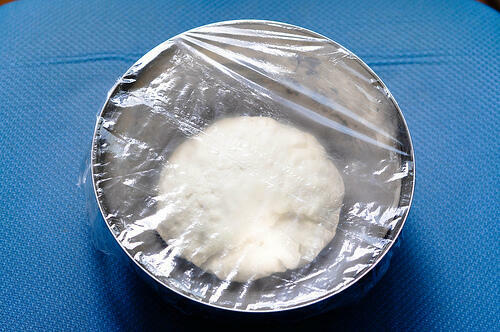
Add some olive oil to your fingertips and knead until the dough springs back when you press with your fingers – about 4-5 mins.
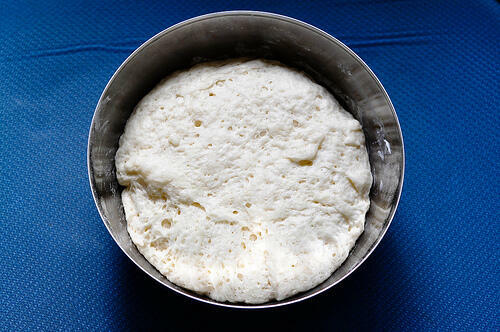
Wrap in cling film and allow to double by keeping in a warm place for about 45 mins. You can also cover the bowl with a damp clean kitchen towel or even a plate.
As the dough rises, make the garlic spread by simply mixing all the ingredients. Set aside until needed.
Grease a baking pan or loaf tin with olive oil. I used my glass Pyrex loaf pan which was the perfect size for 8 mini garlic rolls.
Knock down the air in the dough once risen and divide it into two equal portions.
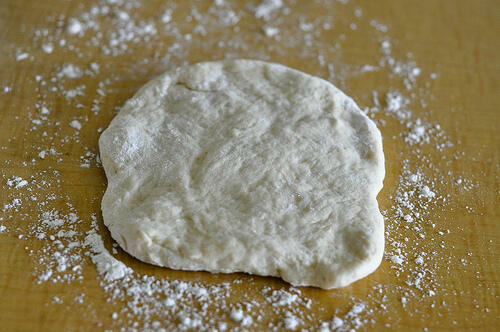
Transfer one portion of the dough to a floured surface and roll gently into a rectangle of about 1/2″ thickness. Apply more flour sparingly if sticky.
Spread about 2 tbsp of garlic spread on one side.
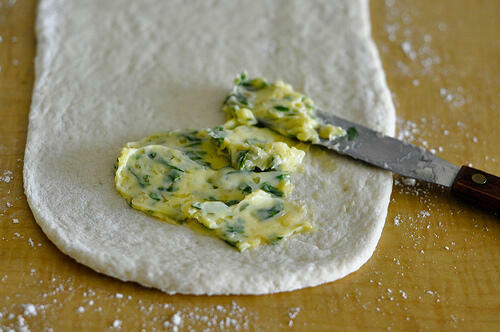
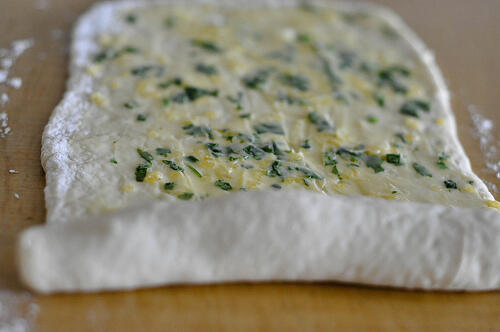
Roll from one end gently and as tightly as you can.
Cut into half and then each half again into two halves to get 4 equal portions.
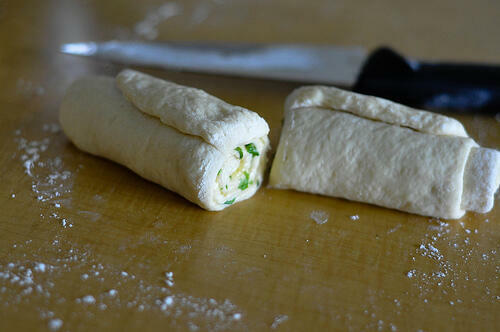
Now place the rolls with the cut side up in the greased pan.
Repeat the same procedure with remaining dough.
11. Spread a little milk on the rolls and add the remaining garlic spread on top. You can also add some sesame seeds or chia seeds on top to add some crunch.
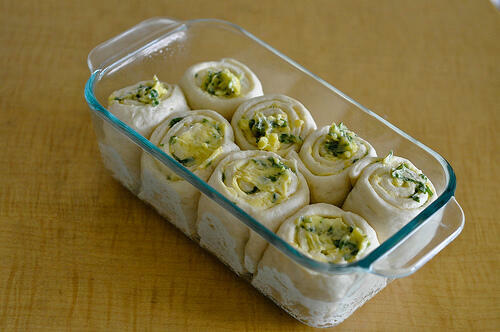
12. Allow to rise for another 20 minutes, loosely covered with foil or a damp kitchen towel.
In the mean time, preheat the oven to 180C / 375F.
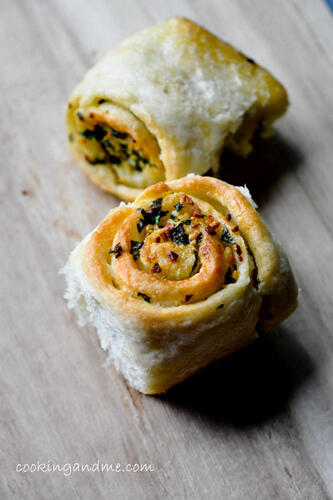
Bake the garlic pull-apart rolls for about 30 mins until the top is golden brown. My Pyrex glass pan usually takes longer to bake in, so mine took about 35 mins to bake just right.

These rolls are really soft and have an amazing flavour. Serve fresh and hot!
Notes:
1. The amount of water depends on the type of flour you are using. Use your judgment to get a slightly sticky dough that behaves when you apply oil.
2. The amount of yeast can be reduced if you don’t like the flavour of yeast too much in your breads. You can add just 1 tsp and let it double over a couple of hours, slowly. Also, if you are using yeast available in India, you need to proof it. To proof yeast, add it to 1/4 cup warm water and set aside for 10 minutes until bubbly. Then use it in the recipe as directed. The quality of yeast will really make a difference to the softness of the bread rolls. Enjoy your garlic bread rolls!
For Garlic Pull-Apart Rolls recipe in Hindi, Tamil, Telugu, Kannada, Urdu, French, Spanish, Malay etc please use the Google translate button in the sidebar.

Hi Nags !! this blog of yours is slowly turning out to be one of my favorites. Today was the first time I actually used yeast to do anything and the rolls taste really nice. Even my lil boy is loving them as he is coming back for more again n again. I had previously tried ur mango cheese cake which was divine. and you also helped me make curd as i live in australia and never thought of boiling the milk before. thanks for inspiring me.
hello swati, very sweet of you to leave a note
hi nags! just tried out this recipe…….super soft n YUM
Hi Nags….I want to make this and your paneer roll recipe for a party lof 30 people. I am making lots more and want to avoid the last minute baking and standing in the kitchen. Can I pre make both these and stick into the over 5 minutes before serving just to re-heat? Or are these to be made absolutely fresh?
You can totally make it in advance and re-heat it. the only thing i'd be careful with is, the top of the rolls could get hard or dry. so when you take them out after baking, brush with some milk and do the same after-re-heating too. and of course, they are not going to taste the same as when they are fresh, but this works too. i'd not recommend making them more than 12 hours ahead though.
OR, here's another idea. make the dough, let it rise once, punch down and make the rolls. keep in the baking tray and refrigerate immediately. let it rise in the fridge slowly until you need to bake them. baking time is barely anything so you can make them fresh. yep, i'd recommend this option for sure.
Nags,I am a great fan of your blog like many others. You are an inspiration for me. I had no yeast and hence bought self rising flour (Great Value from Walmart) and exactly followed your recipe. I assumed that SRF will need no yeast. I let the dough sit for 90 minutes. Also i did not apply milk on top before baking. The end result came out too moderate. I mean, the base of the rolls became very hard and somewhere it was all wrong. The rolls were dry and lacked something more. Any thoughts ?ThanksV
Hey Vids, self-raising flour doesn't substitute for yeast in bread. Even if you use that flour, you have to use yeast as well otherwise the bread won't come out soft. Hope you try again 🙂
Hey…It looks wonderful…nothing like freshly baked bread..sadly I am in a very small town currently and not very sure if I can get yeast here..I often go through recipes and make mental notes of variations I would like..I came across this recipe of yours and thought a thin layer of spicy boiled potatoes in the roll could also taste divine…wish I could try it someday soon 🙂 Sonal.
Hi Nags, I am actually laughing my lungs out right now, for having made a fool of myself with this fool-proof recipe. What was I thinking, just a few days into baking, & here I thought of experimenting!!!The last time I baked these rolls, the dough was a bit thicker and didn't spread much and easily, however, the taste was just near perfect!. So I thought of trying again, to better it this time. Dunno what got into me, and I said to myself, let's make this a healthier version, using the atta (whole wheat flour!!). Only thing good was the dough spread easily, that's it. Rest all has been a DISASTER!! The rolls are in the oven since morning (it's afternoon here now!). Seems like somethings are better eaten sinfully. Sharing my disaster experience so that the health-conscious ones & the moms out their don't try this so called healthier version. Better stick to the plain flour!!God bless you! 🙂
oh no! although you made it sound hilarious it happened, i am sorry it did. hope you try again with regular flour and make up for it 🙂 thanks for sharing your experience teena
This is just one of the many recipes from your blog I have tried. Like the others, loved it!
Never thought I'd be using ingredients such as yeast and gelatin (for the mango cheesecake). They intimidated me.
Thank you very much. I hope your ability to scout easy, fool-proof recipes and your talent at presenting them so clearly (with good photographs) continues to help several others. Good luck.
tried this recipe (with a lot of trepidation..!) but it came out awesome… so easy too..and yummm!! thank you for sharing especially the pics and clear directions.
Hi. Quick question. I have strong bread flour in the cupboard, can I use this? Or does it have to be plain/all purpose flour? Please help. I want to make these rolls for a lunch with friends on Tuesday. Thanks 🙂
very interesting recipe !! i am trying it right now and keeping fingers crossed !! thank you nags 🙂
Hi,This will be my first attempt baking with yeast and would like to try this recipe. My doubt is what if i knead the dough in the afternoon and use by late evening can i leave the dough outside for so long or should i refrigerate it. please guide me Thanks Anu .
for the amount of yeast mentioned here, you don't need to leave it aside for too long. if you want to leave it longer, reduce the amount of yeast a bit or leave it in the refrigerator and take it out an hour before you plan to bake.