Garlic pull-apart rolls, the easiest bread rolls you can bake, especially if you are a beginner to baking bread at home.
I had been eyeing this recipe of Garlic Pull-Apart Rolls from Suhaina for a long time. When she brought these rolls warm from the oven for our Singapore food bloggers’ meet, I was totally sold. Finally managed to make them this weekend.
I would highly recommend this to all those who are dying to bake but fear the yeast monster. Trust me when I say these eggless garlic pull-apart rolls are really fool-proof and you can feel so proud of yourself when done!
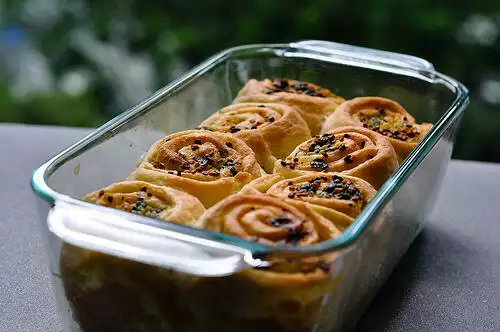
I halved the original garlic rolls recipe and got 8 mini rolls, enough to serve 2 very generously. We had one here and one there, through the weekend.
If you want to try similarly easy bread and rolls, check out my:
pesto pull apart rolls (also eggless)
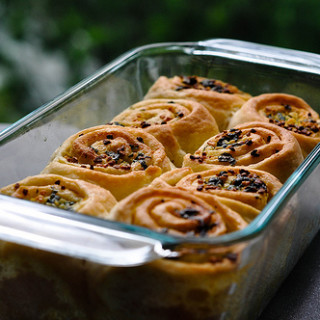
Garlic Pull-Apart Rolls Recipe
Ingredients
For the rolls
- Plain Flour - 1.5 cups
- Warm Water- 1/2 cup + 1 tbsp
- Yeast - 1/2 tbsp instant or active dry yeast
- Salt - 1 tsp
- Sugar - 1 tbsp
- Olive Oil - 1 tbsp + 1 tsp
For garlic spread
- Salted butter at room temperature - 6 tbsp
- Minced garlic - 2 tbsp
- Chopped coriander leaves cilantro - 2 tbsp
Instructions
- Mix 1.5 cups flour, 1/2 tbsp yeast, 1/2 cup + 1 tbsp (if needed) warm water, 1 tsp salt and 1 tbsp sugar together until you get a smooth, slightly sticky dough.
- Add some olive oil to your fingertips and palms and knead until the dough springs back when you press with your fingers - about 4-5 mins
- Wrap the dough in cling film and allow to double by keeping in a warm place for about 45 mins. You can also just cover the bowl with a damp clean kitchen towel.
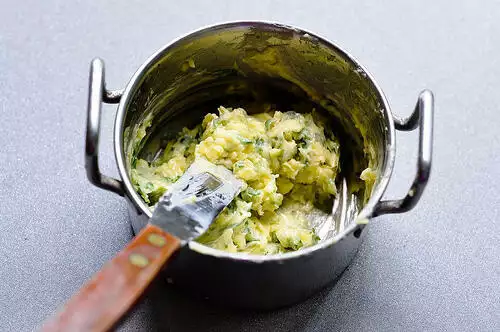
- Meanwhile, make the garlic spread by simply mixing all the ingredients.
- Grease a baking pan or loaf tin with olive oil. I used my glass Pyrex loaf pan which was the 6. perfect size for 8 mini garlic rolls.
- Knock down the air in the dough and divide it into two equal portions.
- Transfer one portion of the dough to a floured surface and roll gently into a rough rectangle of about 1/2" thickness. Apply more flour sparingly if sticky.
- Spread about 2 tbsp of garlic spread on one side.
- Roll from one end gently and as tight as you can.
- Cut into half and then each half again into two halves to get 4 equal portions.
- Now place the rolls with the cut side up in the greased pan leaving some room for rising while baking
- Repeat the same procedure with the remaining dough.
- Spread a little milk on top the rolls and add the remaining garlic spread on top. You can also add some sesame seeds or chia seeds on top to add some crunch.
- Allow to rise for another 20 minutes.
- In the mean time, preheat the oven to 180C / 375F.
- Bake the eggless pull-apart garlic rolls for about 30 mins or until the top is golden brown. My Pyrex glass pan usually takes longer to bake in, so mine took about 35 mins to bake just right. If the top seems to be burning or cooking faster, lightly cover with aluminium foil and continue baking
- These rolls are really soft and have an amazing flavour. Serve fresh and hot!
Step by Step Eggless Garlic Pull-Apart Rolls Recipe:
Mix 1.5 cups flour, 1/2 tbsp yeast, 1/2 cup + 1 tbsp (if needed) warm water, 1 tsp salt and 1 tbsp sugar together until you get a smooth, slightly sticky dough.
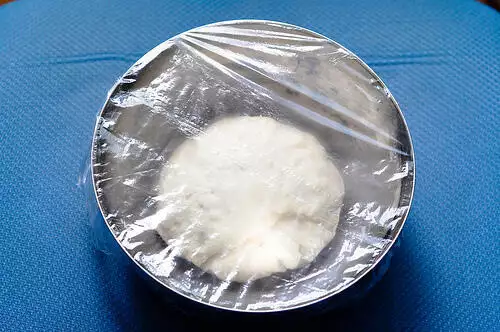
Add some olive oil to your fingertips and knead until the dough springs back when you press with your fingers – about 4-5 mins.
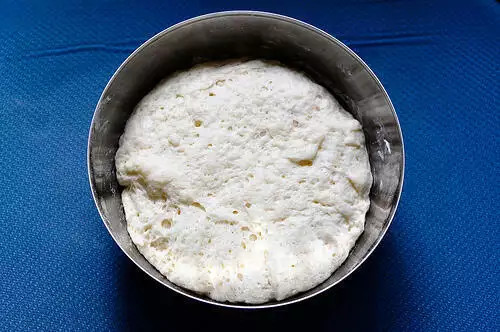
Wrap in cling film and allow to double by keeping in a warm place for about 45 mins. You can also cover the bowl with a damp clean kitchen towel or even a plate.
As the dough rises, make the garlic spread by simply mixing all the ingredients. Set aside until needed.
Grease a baking pan or loaf tin with olive oil. I used my glass Pyrex loaf pan which was the perfect size for 8 mini garlic rolls.
Knock down the air in the dough once risen and divide it into two equal portions.
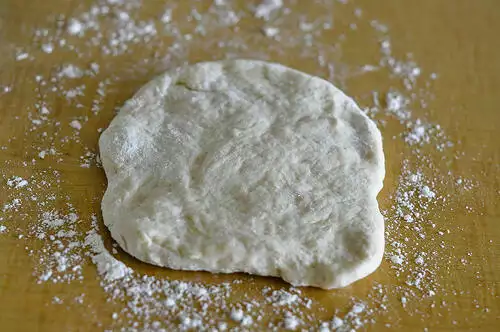
Transfer one portion of the dough to a floured surface and roll gently into a rectangle of about 1/2″ thickness. Apply more flour sparingly if sticky.
Spread about 2 tbsp of garlic spread on one side.
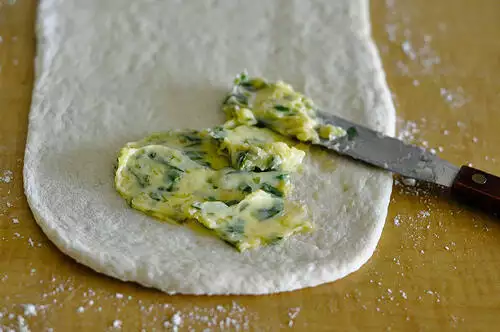
Roll from one end gently and as tightly as you can.
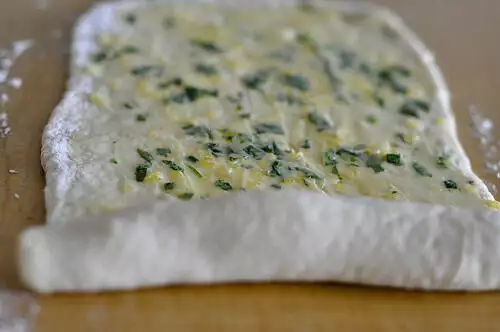
Cut into half and then each half again into two halves to get 4 equal portions.
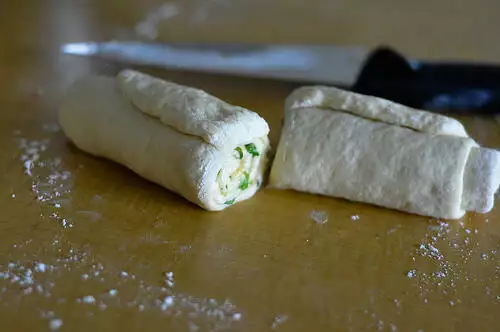
Now place the rolls with the cut side up in the greased pan.
Repeat the same procedure with remaining dough.
11. Spread a little milk on the rolls and add the remaining garlic spread on top. You can also add some sesame seeds or chia seeds on top to add some crunch.
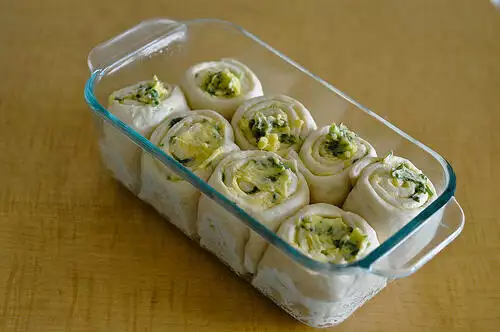
12. Allow to rise for another 20 minutes, loosely covered with foil or a damp kitchen towel.
In the mean time, preheat the oven to 180C / 375F.
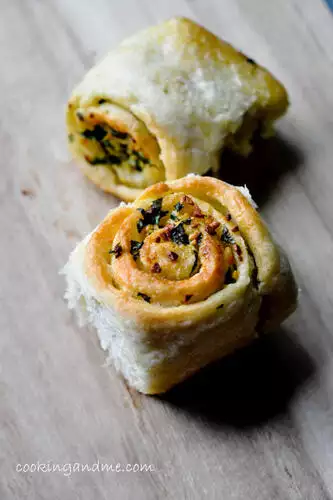
Bake the garlic pull-apart rolls for about 30 mins until the top is golden brown. My Pyrex glass pan usually takes longer to bake in, so mine took about 35 mins to bake just right.

These rolls are really soft and have an amazing flavour. Serve fresh and hot!
Notes:
1. The amount of water depends on the type of flour you are using. Use your judgment to get a slightly sticky dough that behaves when you apply oil.
2. The amount of yeast can be reduced if you don’t like the flavour of yeast too much in your breads. You can add just 1 tsp and let it double over a couple of hours, slowly. Also, if you are using yeast available in India, you need to proof it. To proof yeast, add it to 1/4 cup warm water and set aside for 10 minutes until bubbly. Then use it in the recipe as directed. The quality of yeast will really make a difference to the softness of the bread rolls. Enjoy your garlic bread rolls!
For Garlic Pull-Apart Rolls recipe in Hindi, Tamil, Telugu, Kannada, Urdu, French, Spanish, Malay etc please use the Google translate button in the sidebar.

hi…am very new to baking! also very scared of those involving yeast! but since this looked very easy, i went ahead and tried! it turned out to be a tragedy of errors!
there were lots of difficulties i faced:
1.the yeast did not dissolve in the dough..as it looked stony in the dough…
2.even though i kept for 2 hrs there was no proving..as in it did not double..
3.the butter came to bottom…
4.the top was very crispy
5.the inner part of the roll was not like bun/bread-like!
hope u will help me findin my mistake!
btw i love your site!! good job!
In your recipe you used Plain flour. Is that the flour normally used for making cakes ( i dont mean self raising flour)
yes i used regular flour for these rolls
Hi Nags,
I wanted to let you know that I tried the rolls again this weekend with lesser amount of butter and they turned out perfect! No butter bubbling at the bottom. So, Yay to u and ur advice! 🙂
-Priya
awesome! 🙂
i have heard this feedback from others too, that the butter pools at the bottom. i didn't have that problem so not sure what's causing it. maybe you are adding too much butter?
Hi Nags,
I tried this recipe this weekend. I had all the ingredients required… including "dying to bake but fear the yeast monster".
The rolls turned out very well.
The only thing that probably went wrong was that I didnt roll the dough firmly I guess. The butter from the stuffing was seen bubbling when the rolls were baking. Not sure if I didnt roll firmly enough or the dough was soft. But I did notice that in the end the butter got soaked up in the bread. Is that how it is supposed to be?
Sorry for the long comment. Please feel free not to publish, but please do reply to my query.
-Priya
Looks so Tempting !!!
ya i did added at the right time. i don no wat went wrong. thanks for replying nags.
The oil should be coated with the dough once you knead it up. Not sure how it pooled at the bottom. Did you mix it in at the right time?