 |
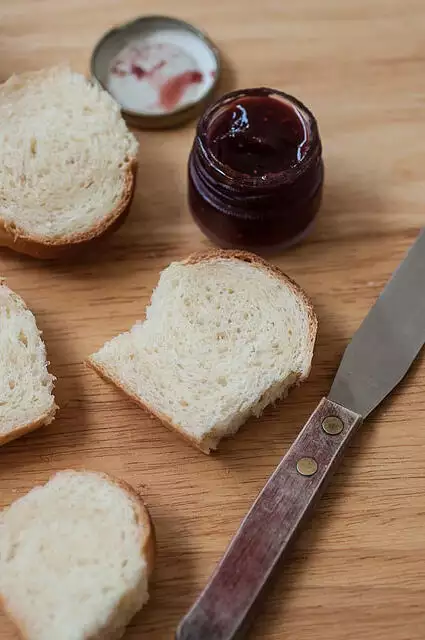
| Plain Hokkaido Loaf, sliced |
The dough made using the tangzhong method is very versatile and you can make pretty much anything you want with it. I made some mini chocolate rolls, a medium-sized loaf with 4 rolls, and one large loaf with chocolate filling over 2 days. One portion of tangzhong was used for these and they turned out wonderful, my oven quirks aside.
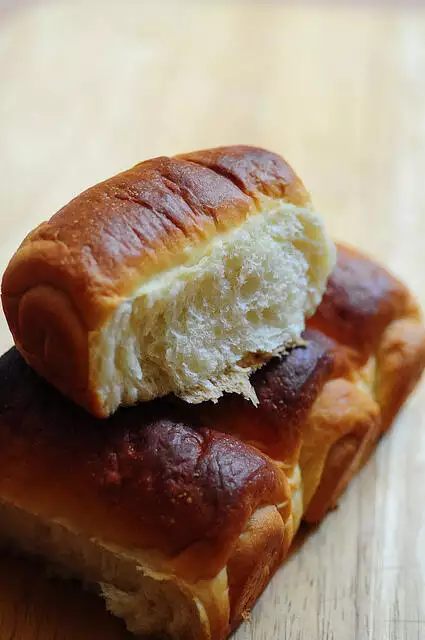 |
| Plain Hokkaido Loaf, pulled apart |
The Hokkaido Bread dough also makes the most fabulous Indian-style Pav and I am looking forward to trying an entire batch of pav the next time I make pav bhaji. The plain rolls above were longer than regular pav but would have worked just as well. I sliced them up into small pieces and we had them with jam for tea (first picture).
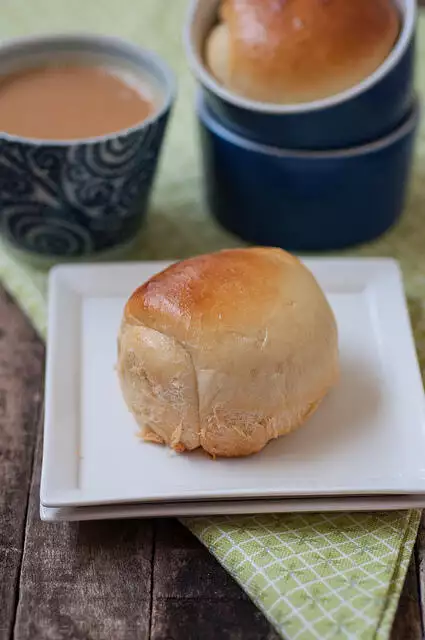 |
| Chocolate Bread Rolls |
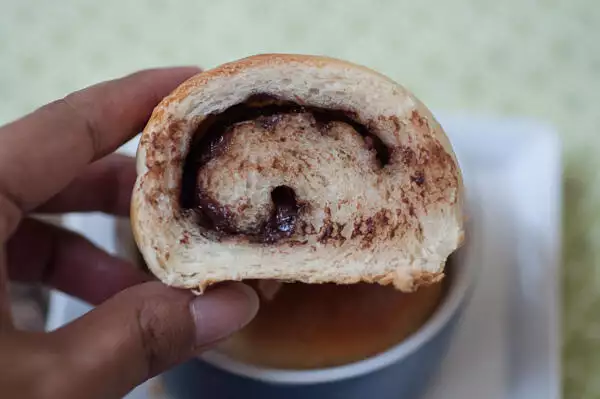
The chocolate rolls I baked in ramekins turned out lovely too. I baked them in a hurry for before going to meet Jey and Raks so they are slightly under-baked but still tasted great with no smell of yeast, according to them.
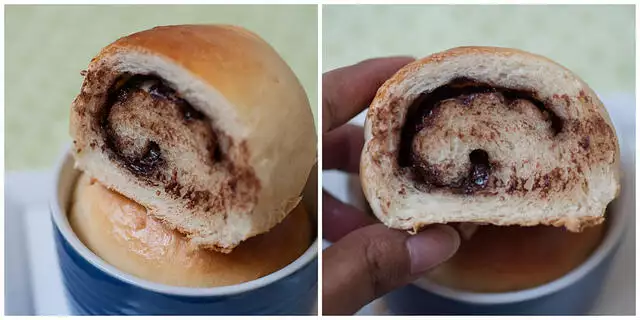
Lesson from above picture, do not cut chocolate swirl rolls when the bread is still warm. The melted chocolate makes a mess. Taste? Not compromised at all!
HOKKAIDO MILK BREAD RECIPE (USING TANGZHONG)
Preparation time: 4 hours
Cooking time: 30 minutes
Makes 1 large loaf or 1 small loaf + 6 mini rolls
Original recipe from 65 Degrees Tangzhong “65C Bread Doctor” by Yvonne Chen
Ingredients:
For Tangzhong
(You only need half the amount of tangzhong for making a large loaf so halve quantities below if you only plan to bake one loaf starting with 2.5 cups flour)
1/3 cup of all-purpose flour (maida)
1/2 cup of milk
1/2 cup of water
For Dough
2.5 cups of all-purpose flour (maida)
3 tbsp of sugar (see notes)
1 tsp of salt
2 tsp of instant or active-dry yeast (I use and recommend Fleischmann’s)
2 tbsp of milk powder
1/2 cup of milk
1/8 cup of cream (or milk)
1/3 cup of tangzhong (half of above cooked quantity)
25 gm of unsalted butter, at room temperature
1 cup of chocolate chips (if making chocolate rolls)
How to Make Hokkaido Milk Bread:
1. First we need to make the tangzhong. For that, whisk the flour, water and milk in a saucepan until smooth and lump-free. Place the stove, and over low heat, let the tangzhong cook till it starts thickening. Keep stirring/ whisking constantly so no lumps form and the roux is smooth.
If you have a thermometer, cook this mixture until it reaches 65 degrees. Otherwise, a good indication is to stop when your whisk leaves concentric lines on the tangzhong like in the picture below.
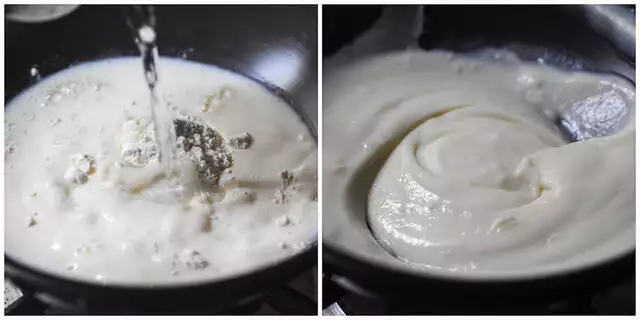
Let the tangzhong cool completely and set aside for at least 2-3 hours before proceeding with making the bread dough.
The dough for Hokkaido Bread is very sticky when you start to work on it. Adding more flour to balance this will ruin the bread so resist that temptation. If you have a stand mixer or food processor to make the bread dough, use that. Or, be patient and gentle while mixing by hand.
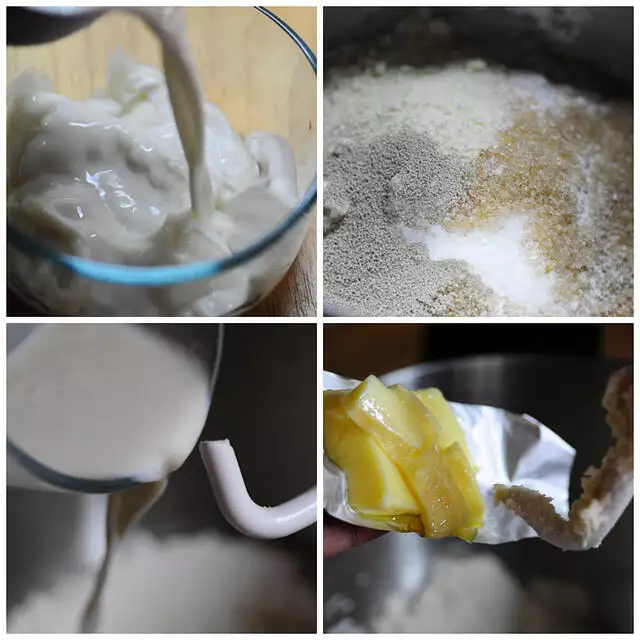
2. First, mix the tangzhong with the milk and cream (if using) until smooth and lump free, I combined gently with my fingertips because the whisk just wasn’t cutting it.
Next, combine the flour, yeast, salt, sugar, and milk powder. Add the tangzhong to this and start kneading slowly (on lowest speed if using a Kitchenaid which is what I did).
When the dough begins to form, add the softened butter. Continue to knead on slow speed for about 10-15 mins. The stickiness of the dough will gradually give way to a very soft and pillowy texture.
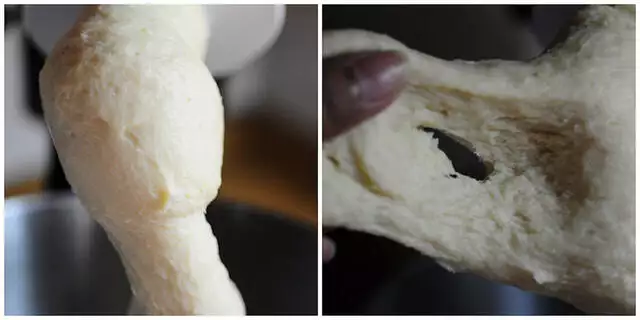
3. When the dough is ready, it will be super soft to touch and also break into a circle when stretched.
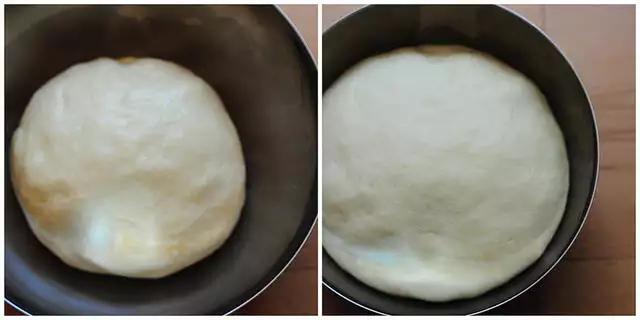
4. Form the dough into a ball and place in a well-oiled bowl. Cover and let it rise for about 45 mins until doubled.
5. After it’s risen, gently knead the dough again and decide which direction you want to go with it. I made one medium-sized plain loaf and 4 chocolate bread rolls.
There’s no need to use flour when working with this dough. The texture was delightful and non-sticky. It’s hard to resist playing with it!
For that, divide the dough into half. Divide one half further into 3 or 4 balls. Gently roll each into an oval. Fold over twice from each end. Turn 90 degrees and roll into a rectangle. Roll and with the free end at the bottom, place into a well-oiled (this is important!) loaf pan. Repeat with the other pieces of dough.
For the chocolate rolls, I merely put some chocolate chips after rolling out the rectangles and before rolling. I baked these in ramekins (again, well-oiled!).
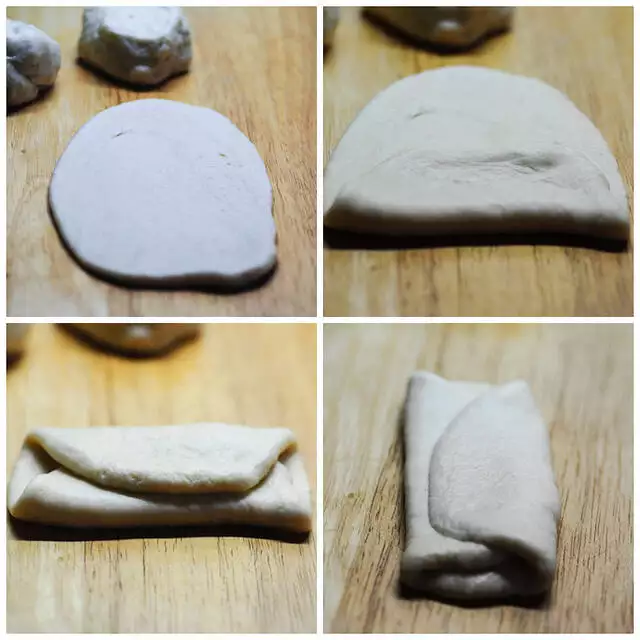
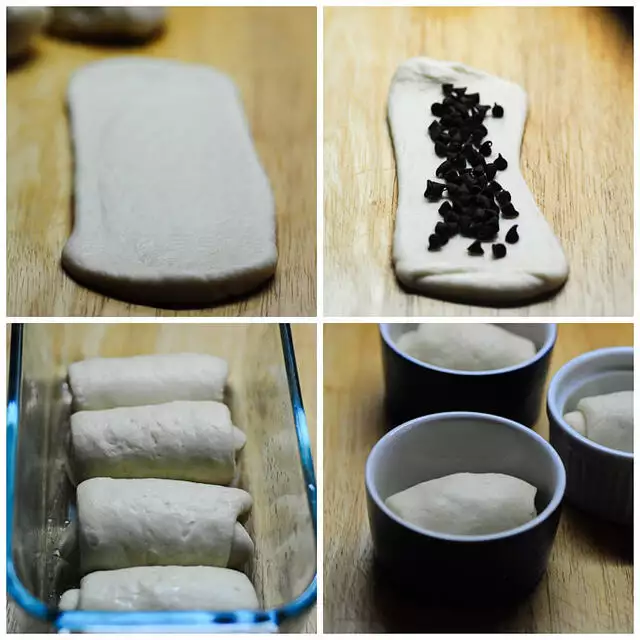
6. Cover and let them rise for another 45 minutes. They will become chubby and double in size. Gently brush with some milk or cream and bake in a pre-heated oven at 170C for about 30 mins.
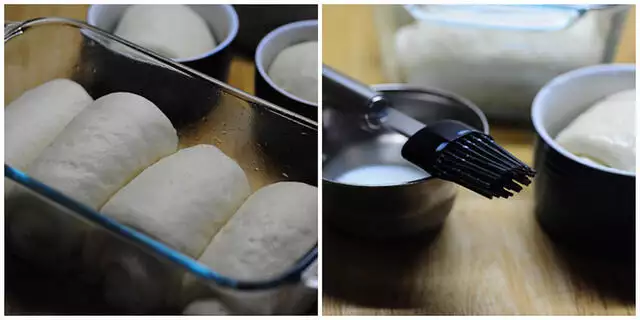
My oven has terrible hot spots and whatever I bake in it gets cooked too soon on top and leaves the bottom uncooked. The loaf looks too dark on top but was perfect overall and cut beautifully into slices. We finished the loaf over two days and it stayed soft and tasty.
Notes:
– This milk bread has some sweetness when you eat the bread as is. If you want to use spicy or savory filling, you can reduce the amount of sugar to 2 tbsp
– Some people experimented with making the entire loaf out of just water and not milk. Of course, then we can’t call it milk bread but still, the bread turns out soft and nice. That would be a good way to veganize this Hokkaido Bread
– If making chocolate rolls, slice only after the rolls have completely cooled
– Hokkaido Milk Bread is bread #3 baked by the We Knead to Bake group. Thank you for a lovely and soft bread recipe, Aparna!

I absolutely love breads and milk bread is my favorite! Definitely gonna a try this.
One Question though – I use active dry yeast normally… So should I activate it first and then put in all the ingredients or no need?
active dry yeast means it’s already active so no need to proof and activate separately. you can use as is
I made this today and it was so good !
I read through so many recipes but I found that this was most detailed and simple at the same time.. sounds contradictory right ?
But the bread was wow. I made just the loaf – but it was heavenly. My son couldnt believe it was home made.
I live in china where this bread is so expensive in japanese bakeries… Now I can make it at home.
Next time, I am going to make the chocolate rolls.
We also get a bread here that has this same taste but a string of sugar running through it, like a cinnamon roll, but its just sugar.
I will try that too.
I loved the small details you gave, like oiling the loaf pan well and so many other details. Thank you !
i am so glad it was helpful 🙂
This is great ! No egg. . . yay! Question though, generally, does one have to add more flour to make it "less sticky"? I have had two unsuccessful results using this method (not this recipe). I measured recipes EXACTLY, but the dough was soooo wet, it wasnt even holding its shape! I plan on definitely trying this one and I will report back soon! Thanks very much for sharing your recipe. 🙂 Farzana
believe it or not, i have that same issue with pretty much every bread recipe i follow and end up adding tons more flour to balance it out. this recipe was a pleasant surprise so hope it works for you too. it will be very sticky to begin with but as you knead, it works out nicely.
Thank you for sharing this recipe. I tried it and the bread was heavenly!
I accidentally used the entire pot of tangzhong and you know what? It turned out tasty anyway and reminiscent of the times I spent in Japan. I like it plain with jam for tea but my husband insists on the chocolate-filled version for next time! Very lovely, pillowy dough and what great instructions and pix! Thank you!
lovely loaves! homemade bread with homemade jam=heaven 🙂 the choco filling looks sooo yumm!
Love all the variations and my fav has to be those irresistible chocolate rolls!!
i ve been seeing teh Hokkaido Bread recipes all over the blogshpere and yet each and every one of them have something different from the other. Its hard to resist the temptation to NOT try them out…I saw Aparna`s turtkes and hedgehogs and loved them! Cute!!! The paav buns inside the ramekins looks specially cute! I wanna try a savoury filling….Lovely clicks nags…
Shobha
Wow perfect bread…can feel the softness in the pics
beautiful and tasty, the bread looks…and what gorgeous pics you click Nags! slurp!!